FabStation includes Time Trackers and ProductionTasks. These tools help you document the work completed, maintain accountability, and support quality control throughout production.
This article explains how both features work and how your team can use them on the shop floor.
Time Trackers in App
Most stages in the FabStation production workflow includes a Time Tracker. Time Trackers allow users to log how long they spent working on a specific stage of an assembly.
How Time Tracking Works
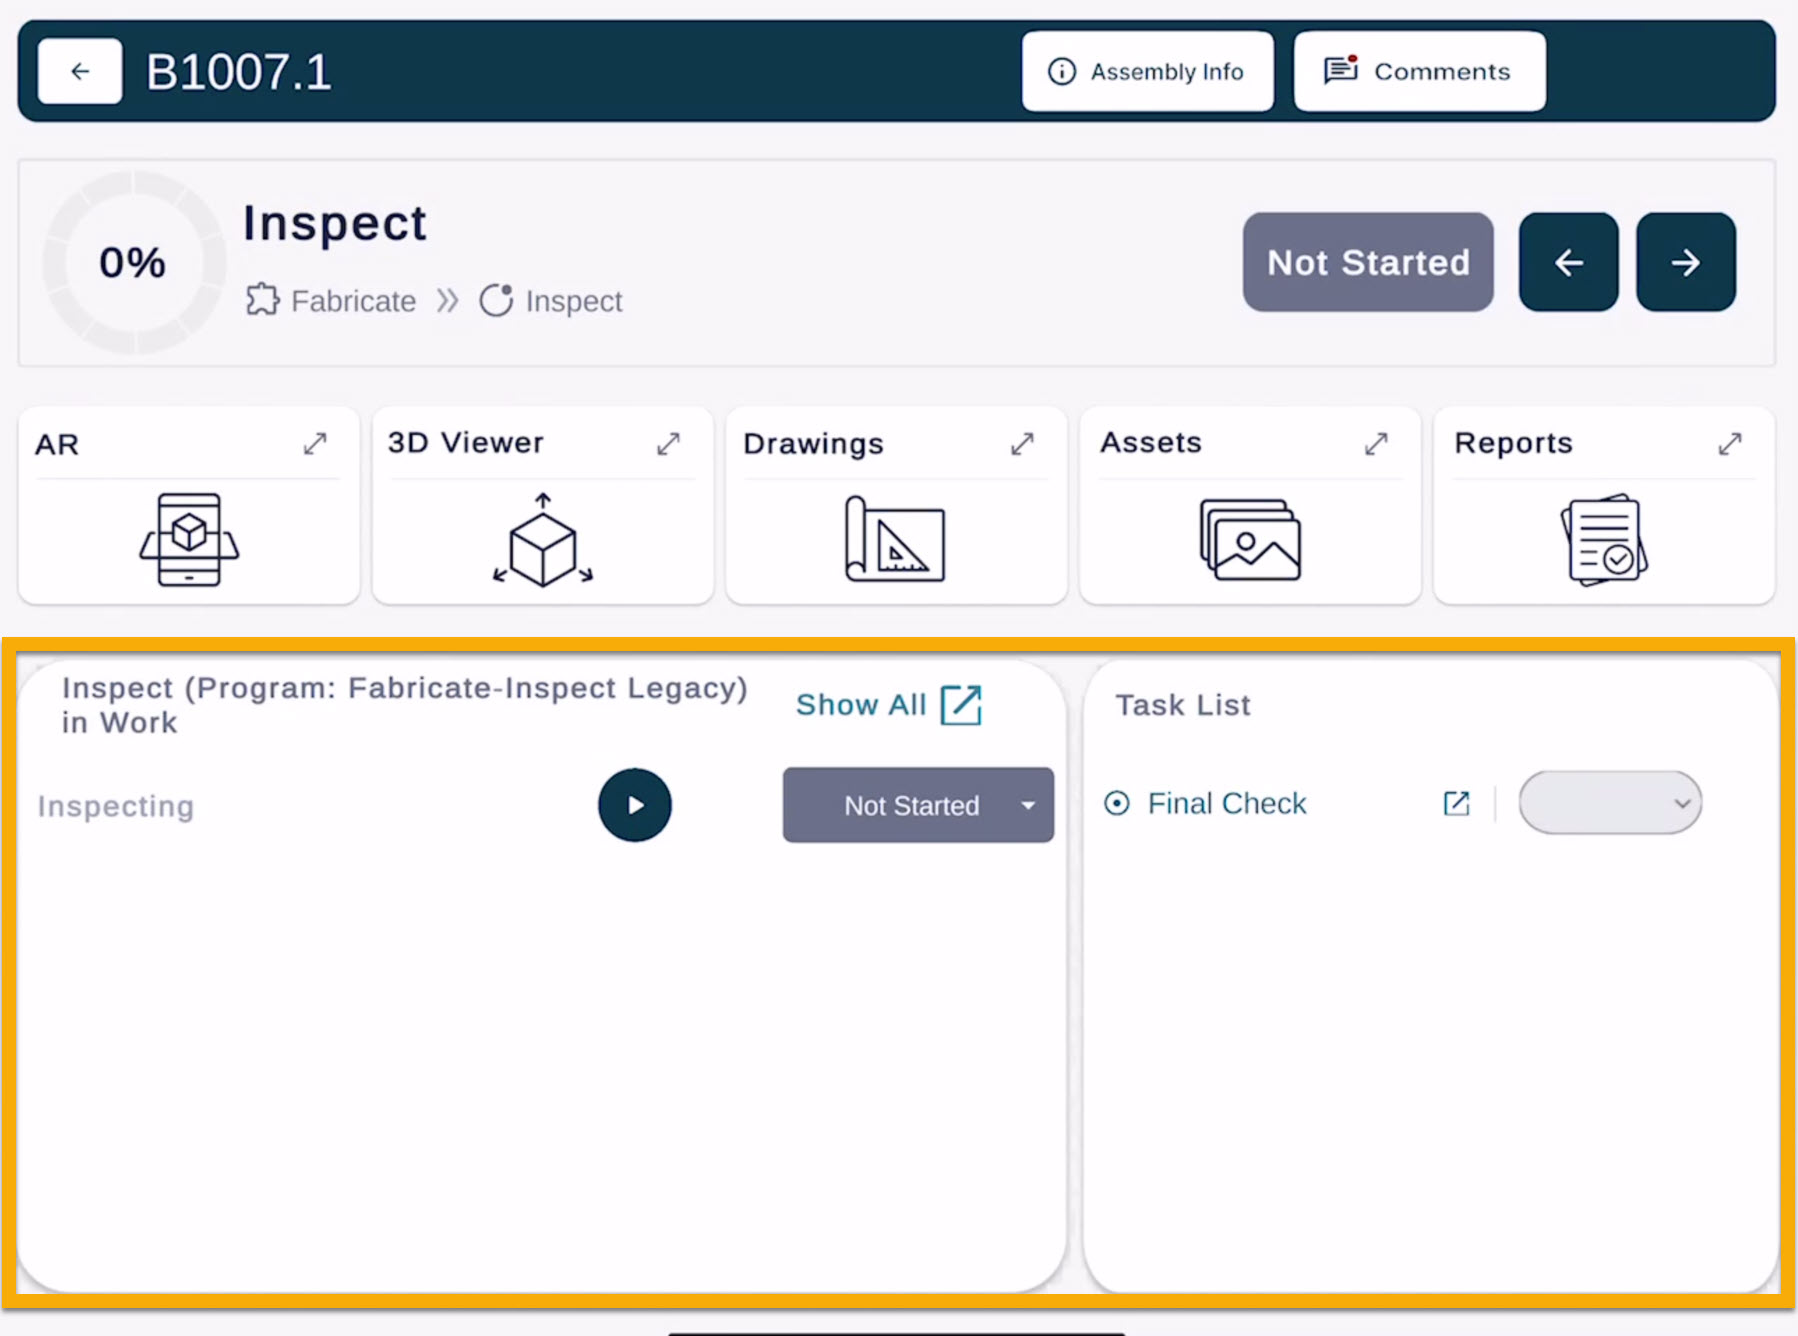
First, log in to your FabStation account on your device. Select the assembly you are working on. Tap the current stage (e.g., Assembly, Welding, Surface Preparation).
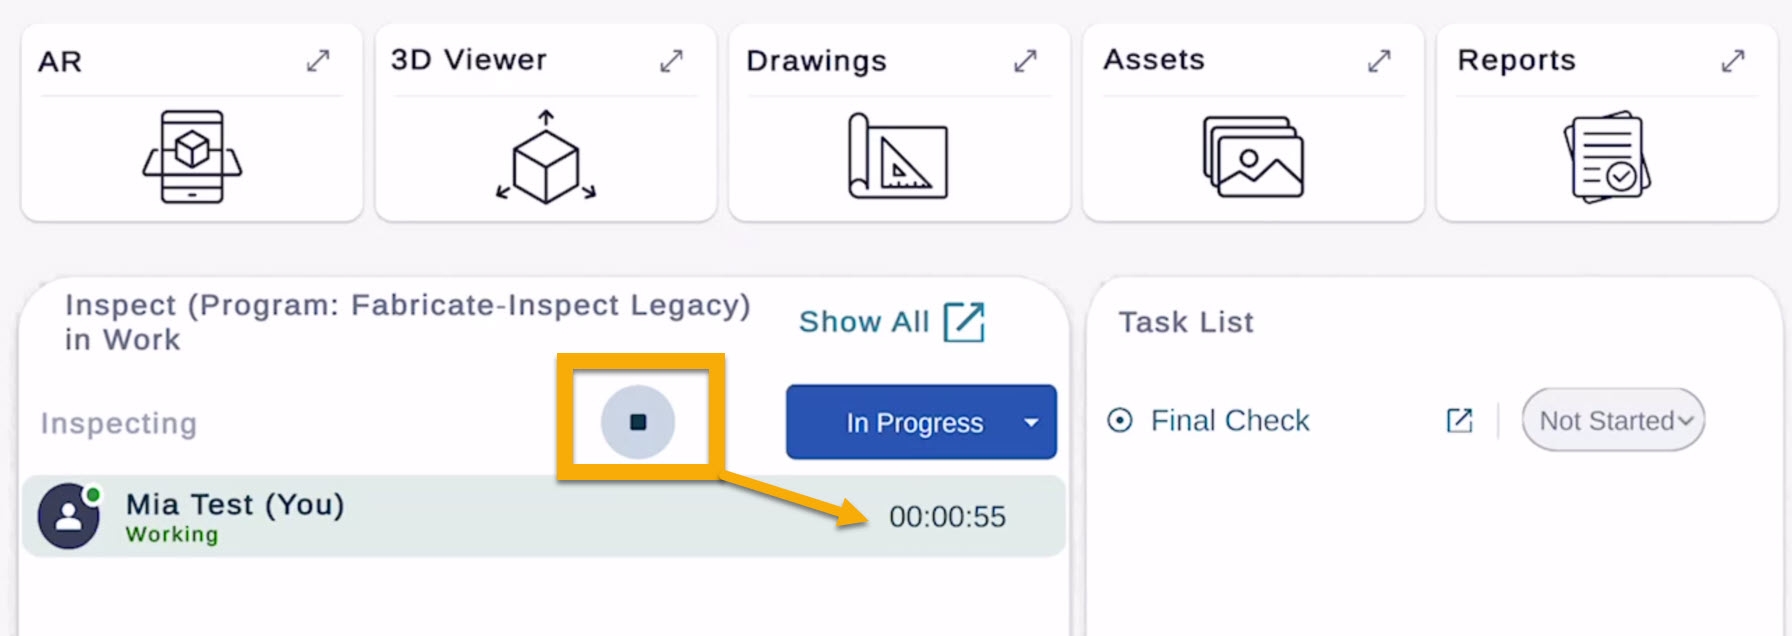
Press Start on the Time Tracker to begin logging time. Once started, FabStation will track the production time for that specific stage while the user is inside the 3D or AR area of the app. The tracked time is updated in real time.
If you need to step away, press Pause.
When the work is complete:
Press Stop, or
Change the stage to Complete, which will also close the tracker.
It is also possible to change the status of the Time Tracker between: Not Started → In Progress → Completed
Tracking Time with Multiple Users
Multiple users can track time at the same time for the same stage and the same assembly. However, each user must be logged in on a different device. This allows FabStation to track each user’s time separately.
Note
It is not possible to mark a stage COMPLETE if there are any outstanding tasks.
Time Trackers in Web Portal
Editing Time Trackers in Web Portal
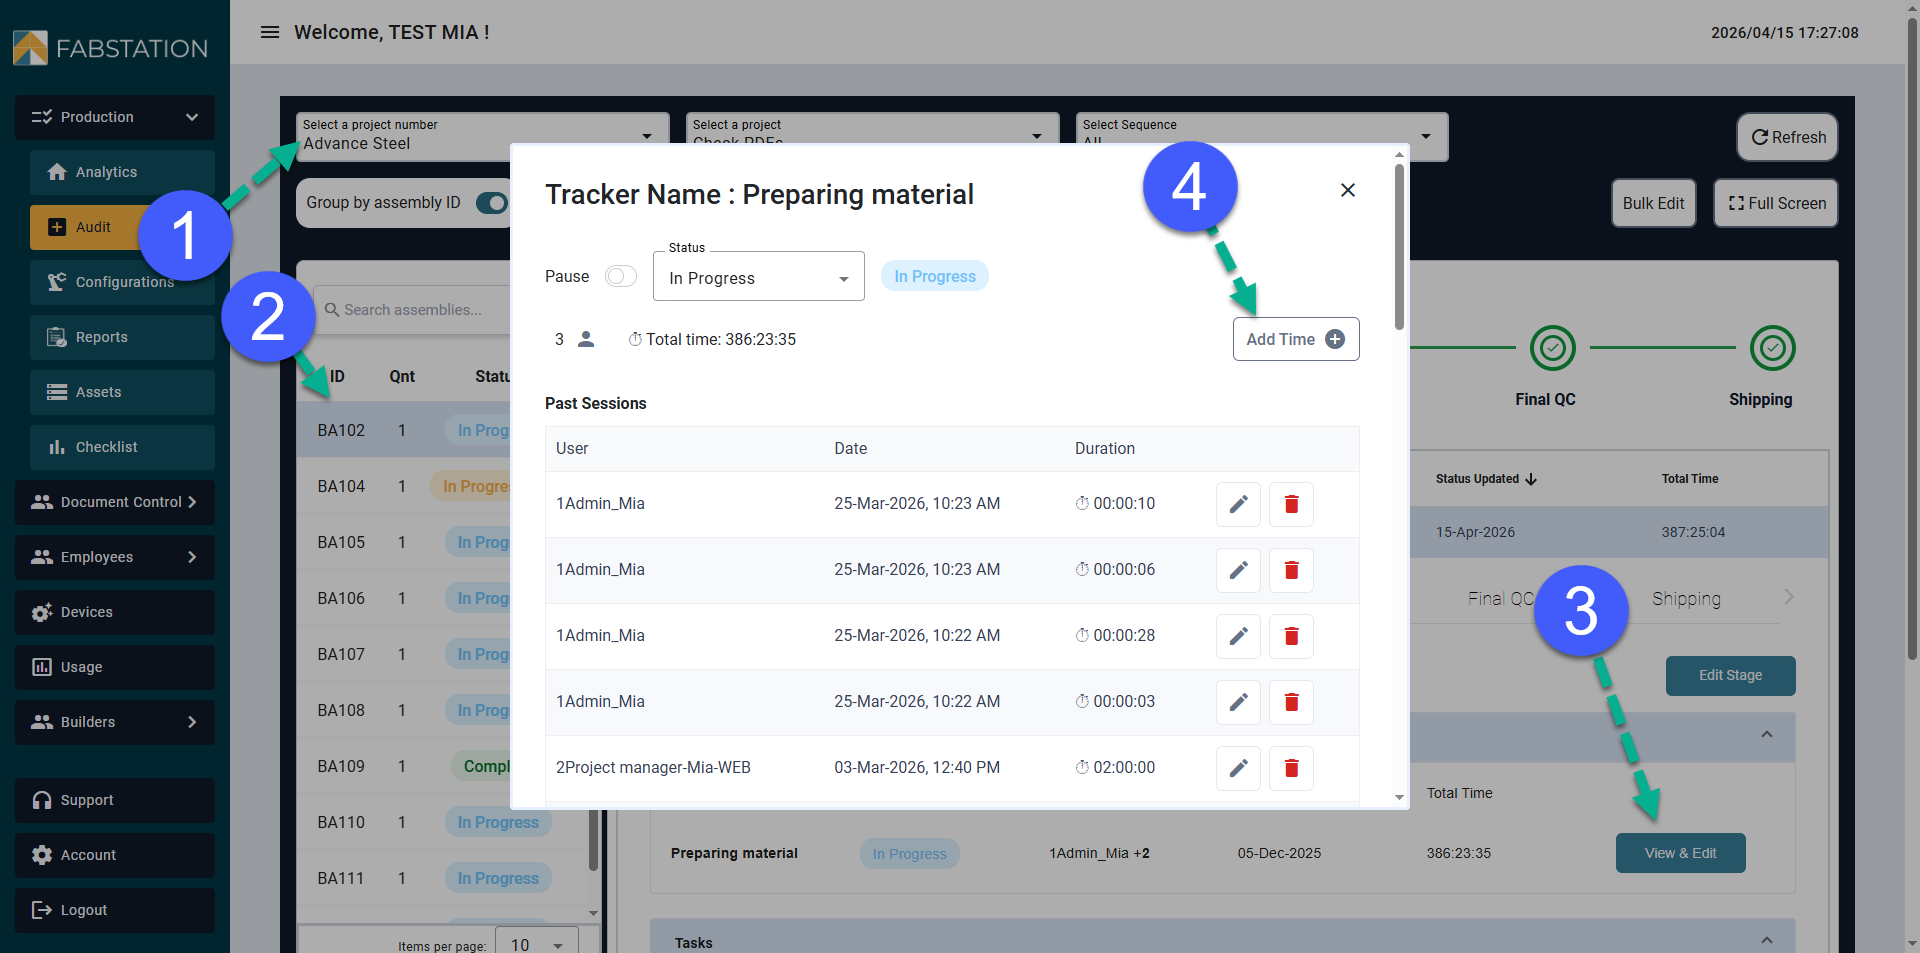
If time was not tracked directly in the app, it can also be added manually from the Audit page. This is helpful if a user forgot to start the timer or if time needs to be adjusted after the work was completed.
To add or edit time manually:
Go to the FabStation web portal.
Select Production > Audit.
Search for the project.
Click on the assembly from the left column.
Click View & Edit next to the time entry.
Add or adjust the time as needed by clicking the Pencil Icon or Add Time button.
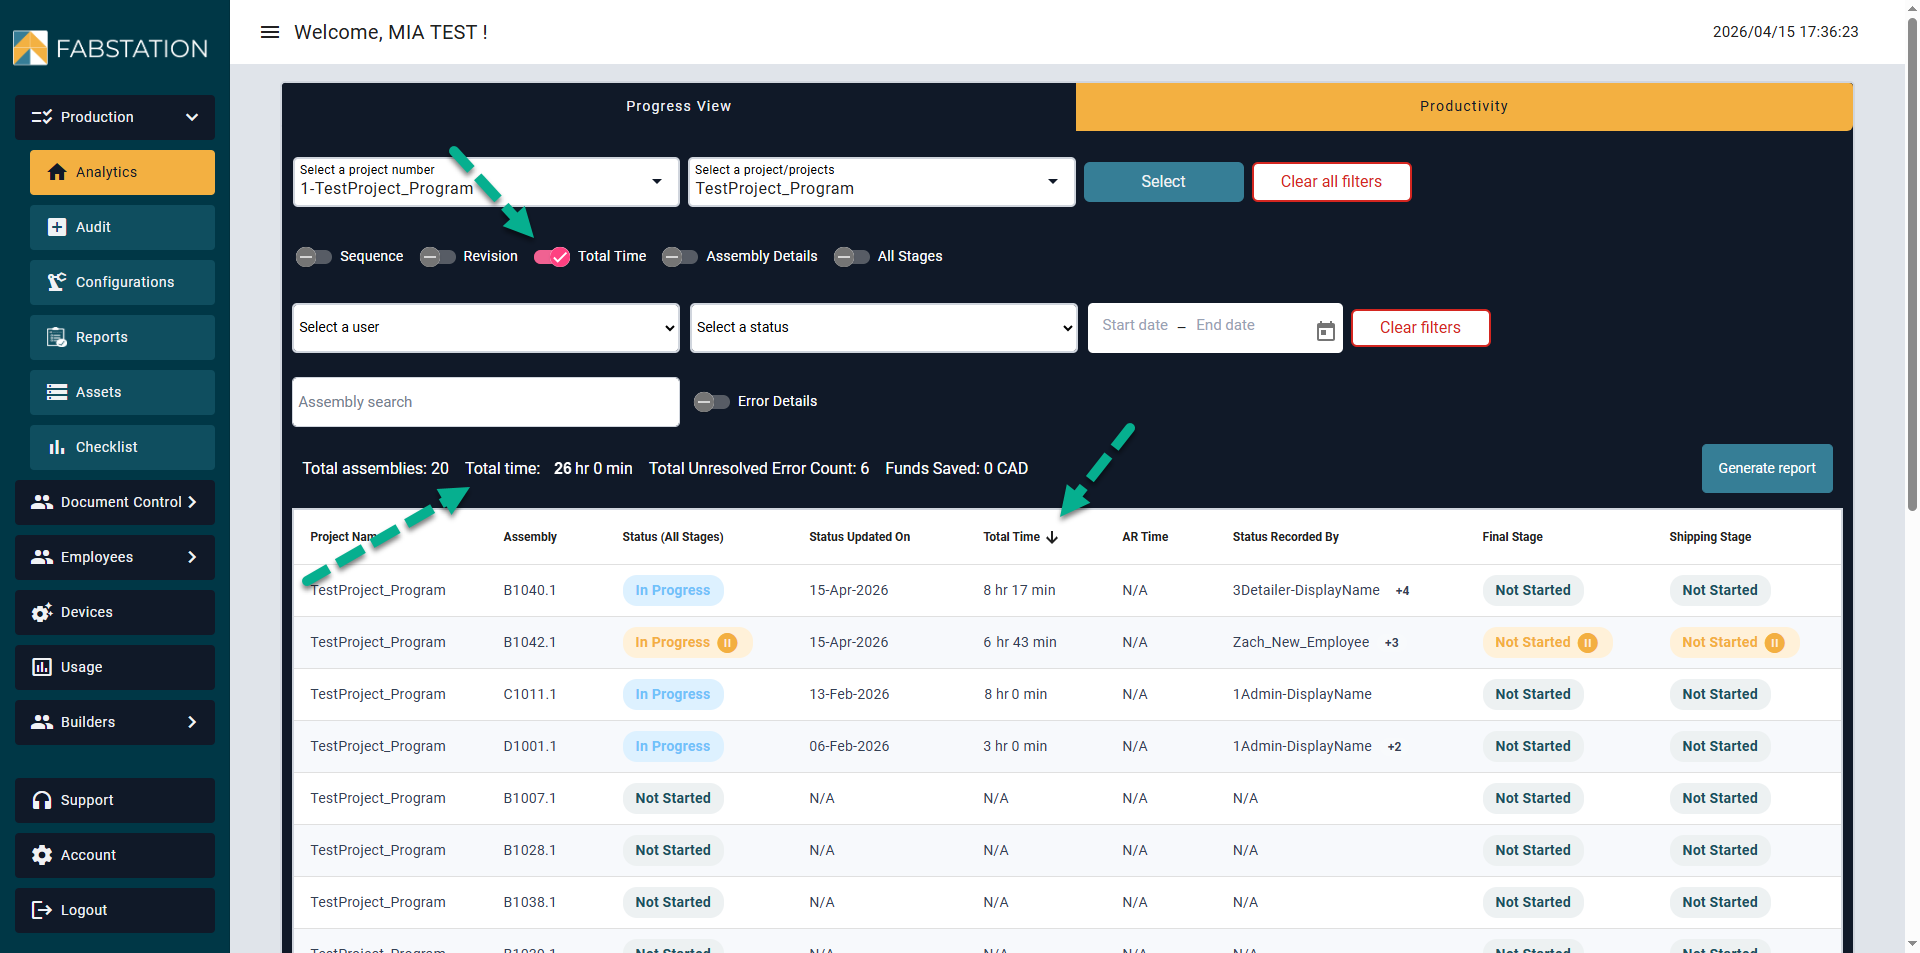
2. Viewing Time Tracking Reports in Web Portal
Time tracking data can be reviewed from the Progress View or the Productivity Page. From there, you can filter the information by:
User
Date
Stage
Assembly
You can also generate reports from the time tracking data. These reports may be exported and used in another software if needed.
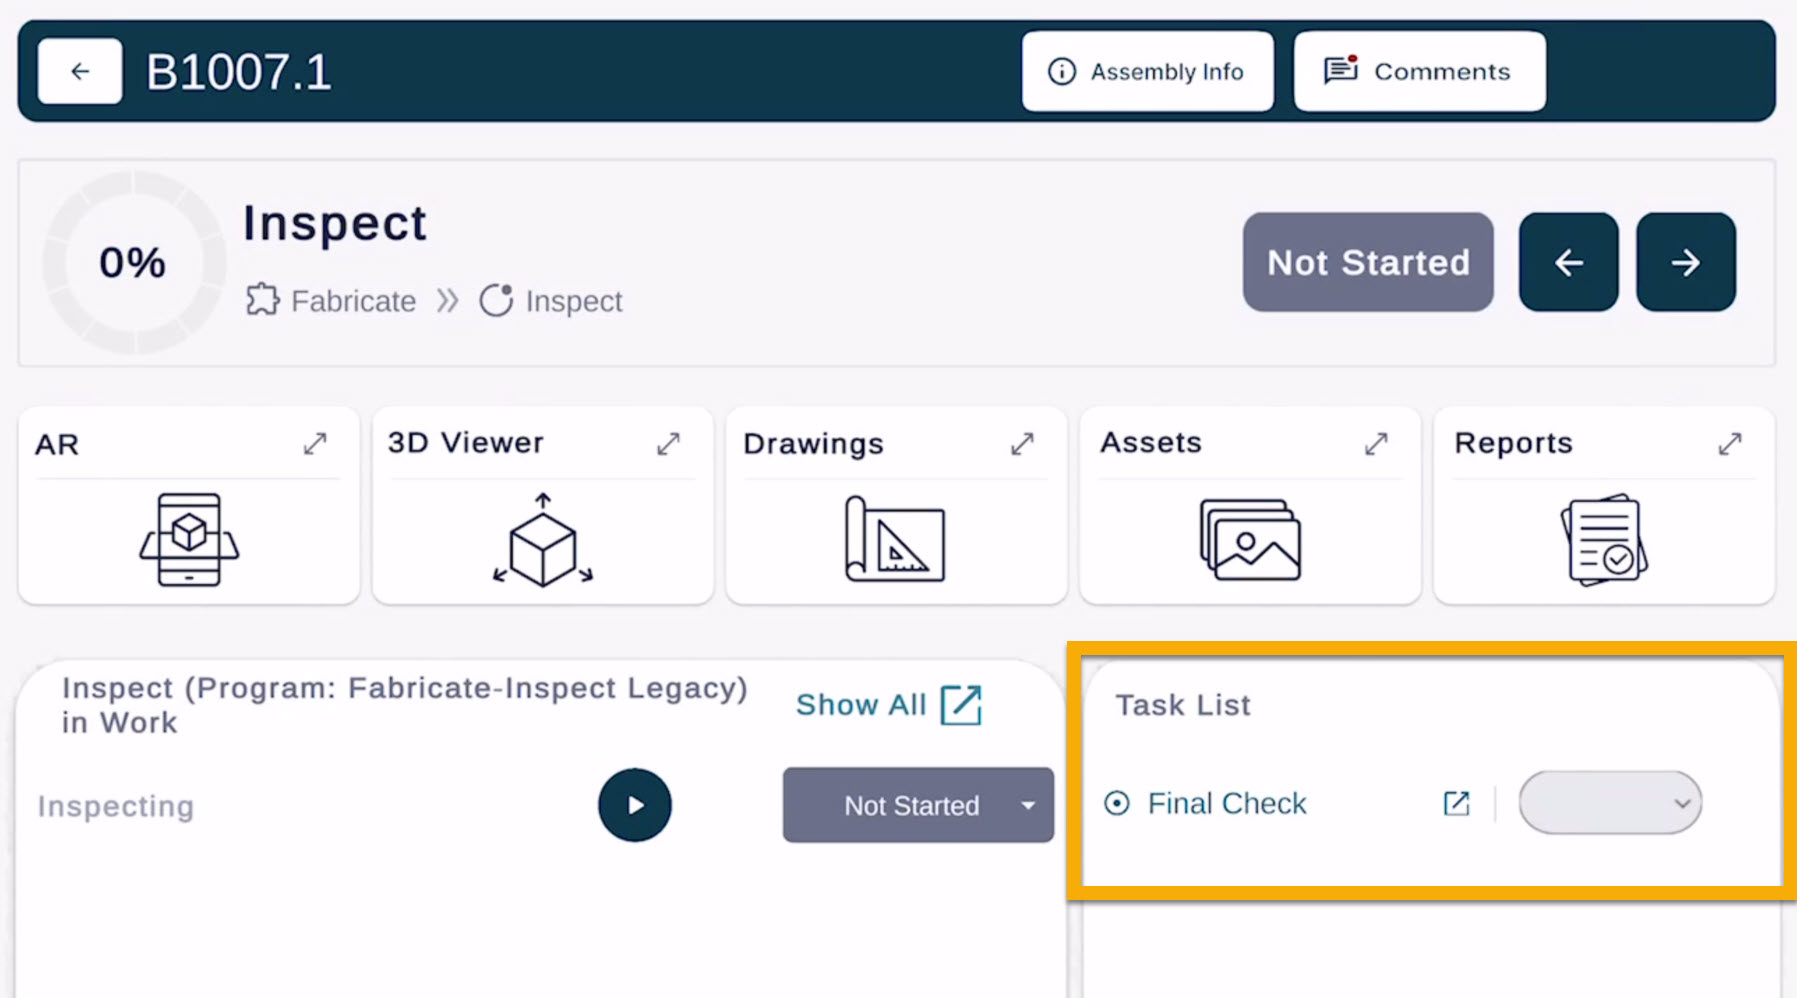
Tasks
Each stage may also include Tasks that guide work and assist in quality verification. Tasks help ensure consistency and help connect AR, 3D Viewer, and documentation back to each assembly.
Learn more about tasks offered within FabStation:
Checklist
Reports
Assets
1. Task: Part Checklist
A part checklist is used to confirm that the correct parts are present and properly fabricated or inspected.
A part checklist is used to confirm that the correct parts are present and properly fabricated or inspected.
Quick Pass Part Checklist
If you tap on the Not Started drop down next to a checklist task, and Change it to Complete, you will be prompted to Pass all parts automatically.
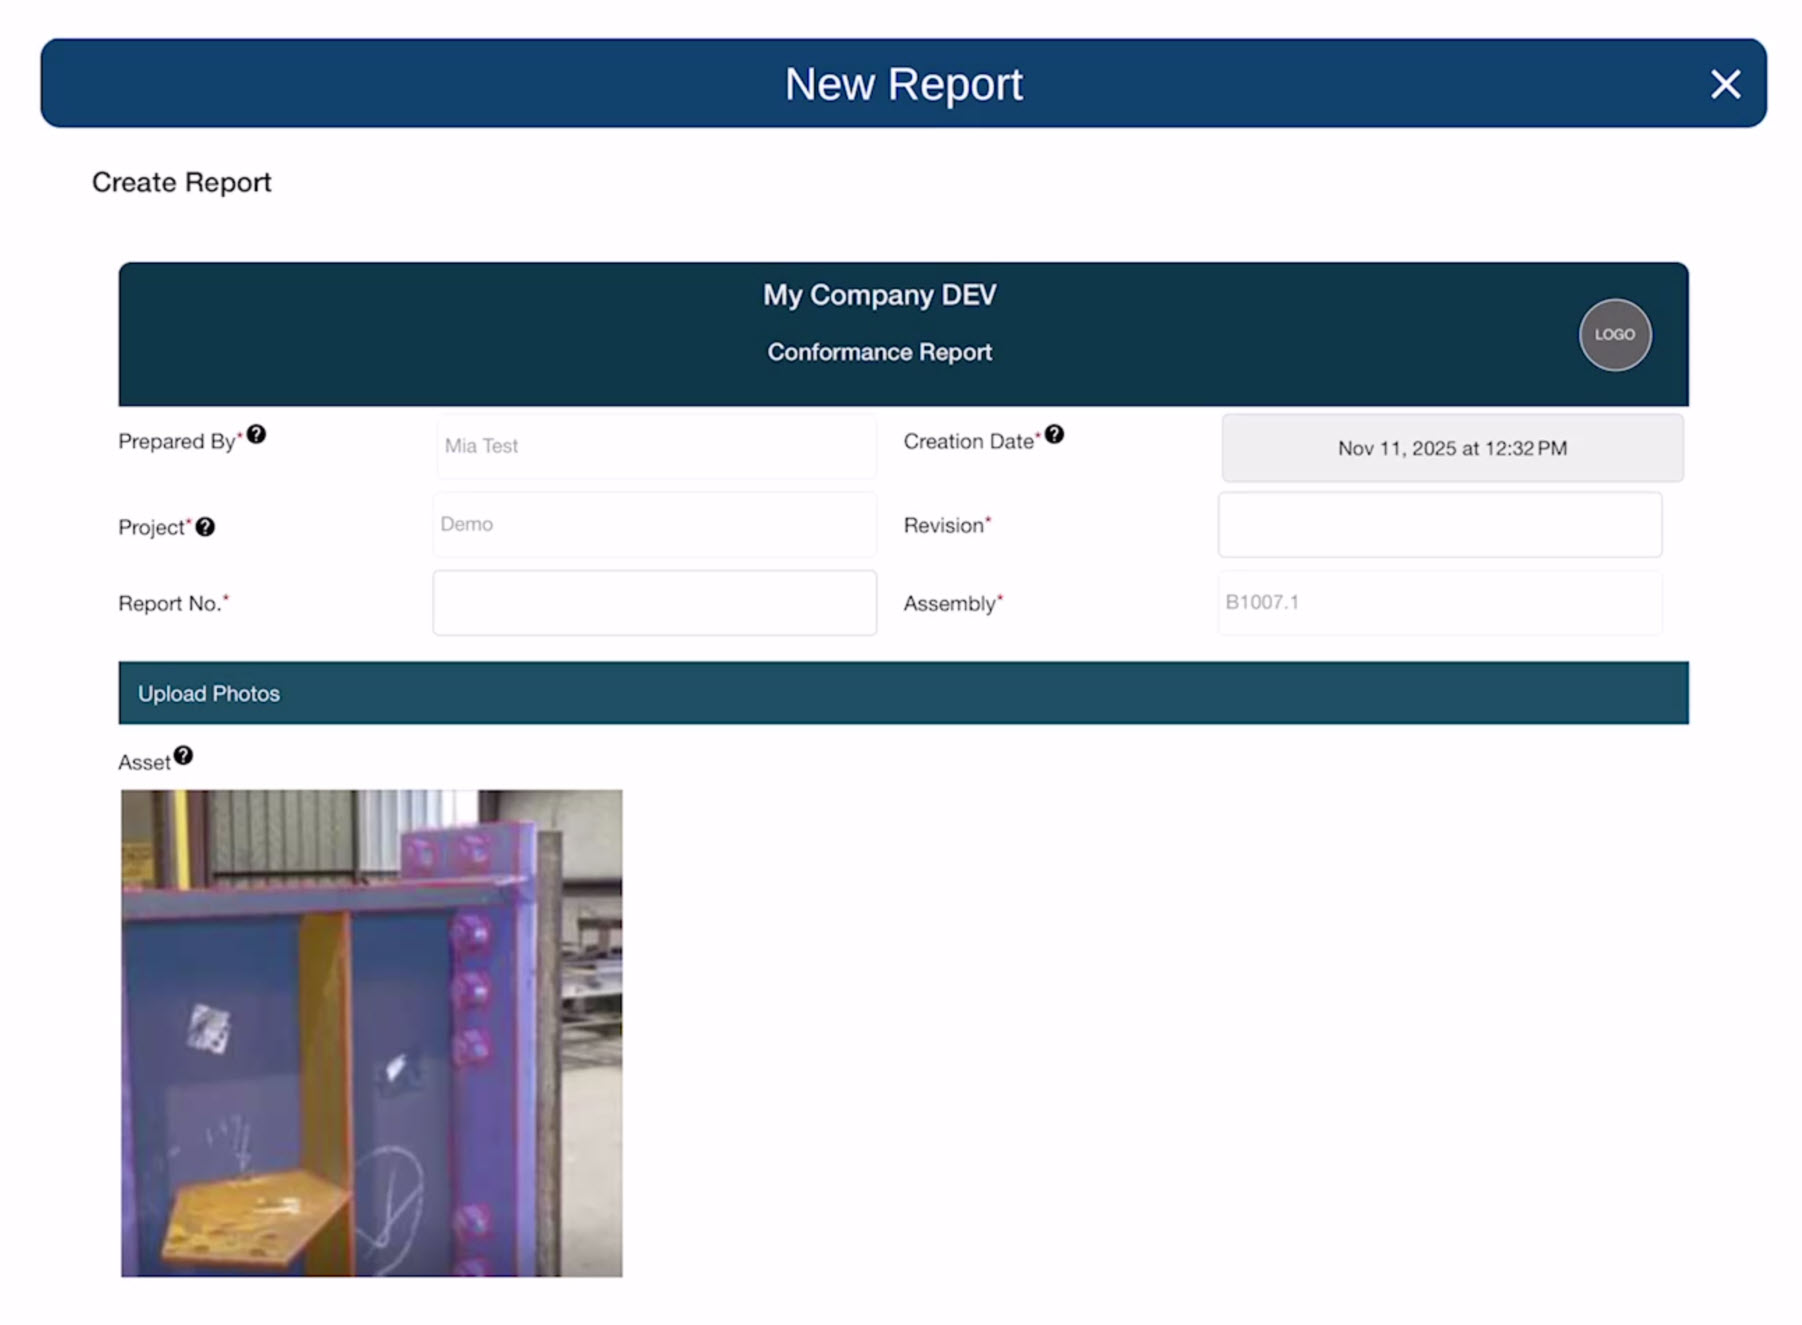
Some stages may include reporting tasks. These are used when issues need to be documented.
For example, you may submit a Non-Conformance Report (NCR) or a Conformance Report (CR) or a Weld Report if something needs to be addressed or confirmed before the assembly can continue.
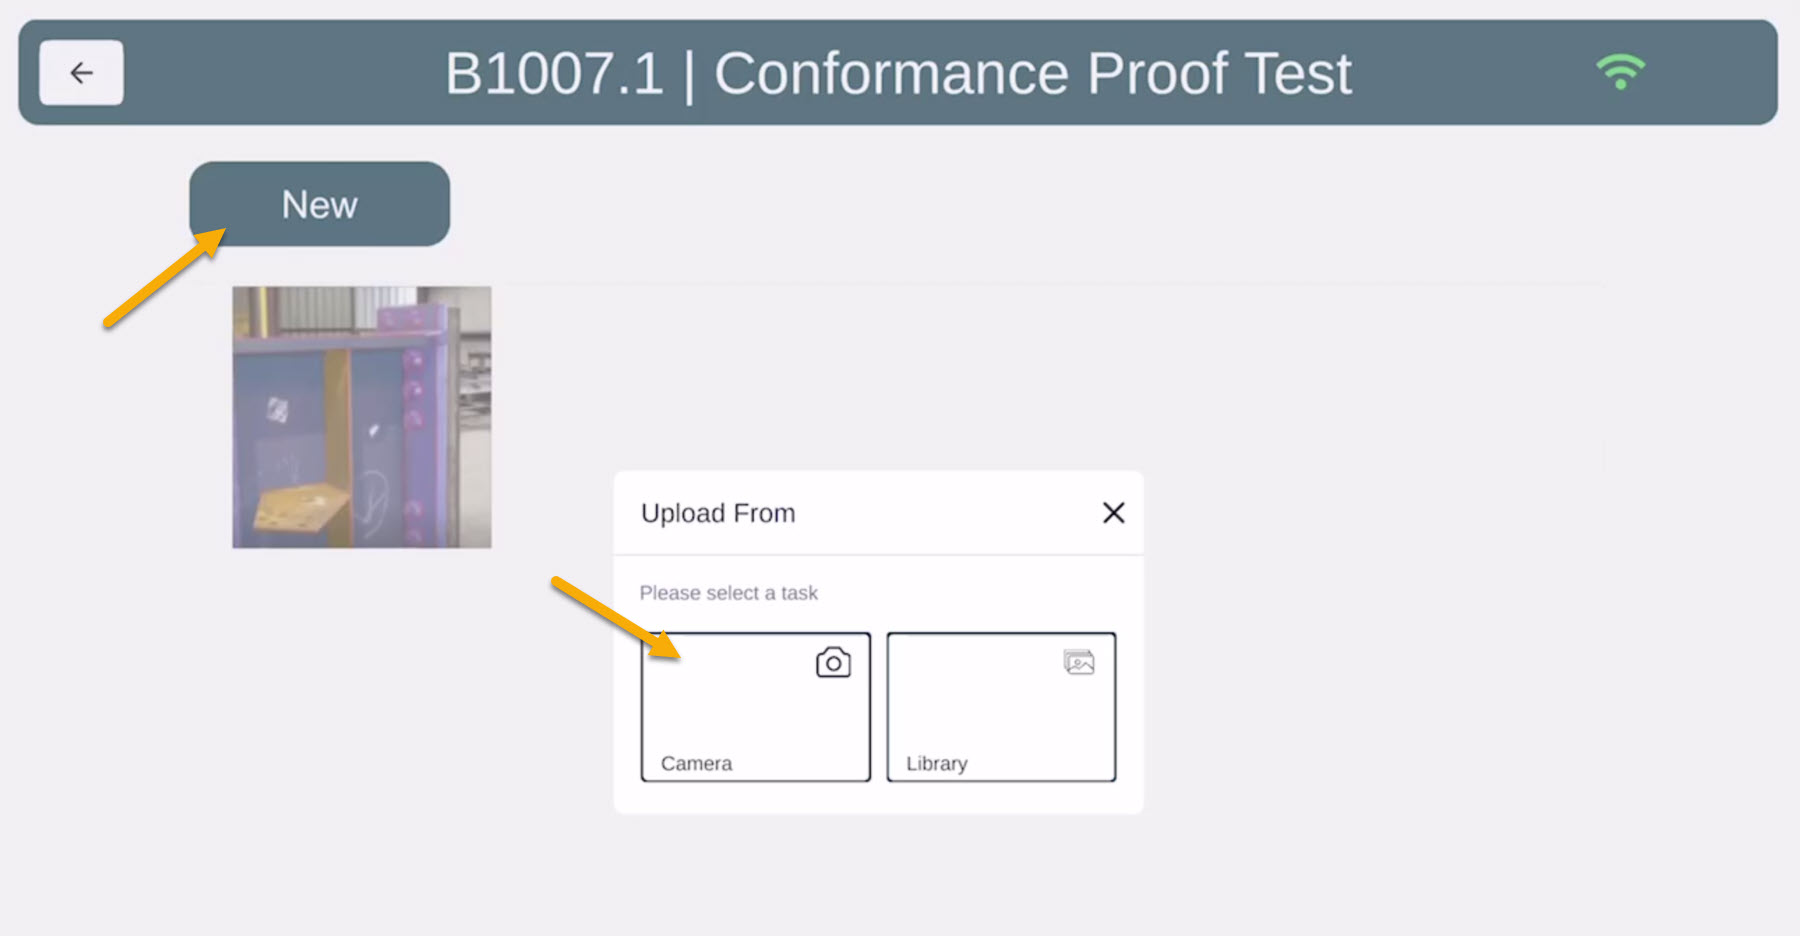
Some tasks may require you to take a photo of your assembly.
You can take photos directly within the app and add markups if needed. These photos are automatically stored under the assembly’s Assets, so they remain linked to the correct project and stage.